First - there are multiple new namespaces in Flash Builder 4. These appear to be confusing at first but you should not be scared by them.

Fx is for the Flash Catalyst packages and contains some new drawing primitives and more. Some of the old
Flex defines two other sets of components: Halo and Spark. The Halo component sets were included in previous releases of Flex, and are defined in the mx.* packages. The Spark components are new for Flex 4 and are defined in the spark.* packages. The Spark components use a new architecture for skinning and have other advantages over the Halo components.
The Halo and Spark component sets contain many of the same components. For example, both component sets define a Button control, TextInput control, and List control. However, while you can use Halo components to perform most of the same actions that you can perform by using the Spark components, Adobe recommends that you use the Spark containers when possible.

A third thing you will see is that the layouts are no longer contained in the header. Instead, they are declared inside a

Here is the Project:
1. Start a new project in Flash Builder 4. Select no server type and either option for the AIR/Flash toggle.
2. Grab a browser and you should be able to validate the servers are up and running by hitting the following URL: http://www.nickull.net/xml/Wines.xml You should see the following XML file:
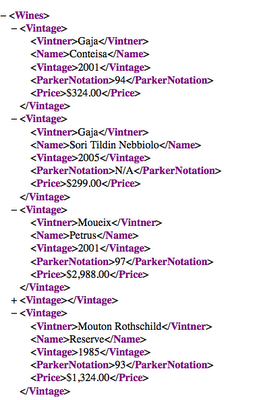
Note 1: In order for this to work, a small file called crossdomain.xml is in the same directory as the Wines.xml on the server. This file helps Flash Player mitigate cross domain scripting attacks. Describing what this file does is beyond the scope of this tutorial, however more can be read at http://livedocs.adobe.com/flash/8/main/wwhelp/wwhimpl/common/html/wwhelp.htm?context=LiveDocs_Parts&file=00001621.html
Note 2: All the wines on this list are favorites and make great gifts for Adobe Evangelists who post tutorials to help you with your work ;-p
3. Copy the URL (Command -C on Mac or Control-C on PC)
4. At the bottom of the Flash Builder IDE, click on the Connect to Data Services link shown below.
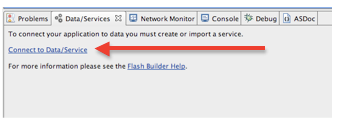
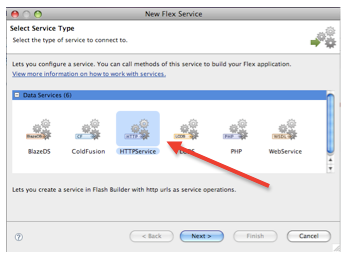
5. This will bring up a dialog box with a number of choices for services. Select the HTTPService option as shown below:
6. Click “Next” and then fill in the next screen by adding the name of the service (“srv” in this case) and add the URL.
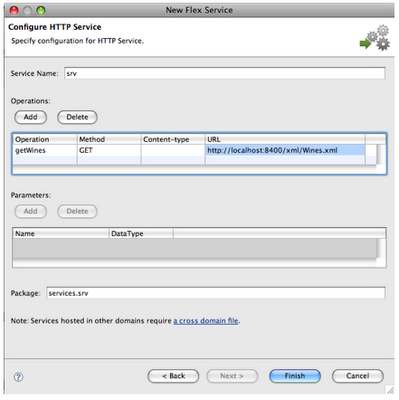
7. After completing this operation by clicking “Finish”, you will see the data services in the panel at the bottom.
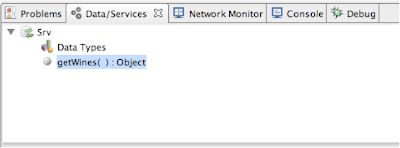
8. Next we need to add an object to bind our data to. Switch to Design view and drag a DataGrid
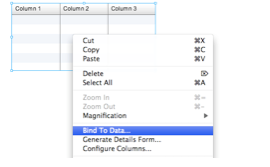
9. Highlight the DataGrid, then right-click (Control Click on Mac) the DataGrid object and select Bind To Data from the menu as shown below:
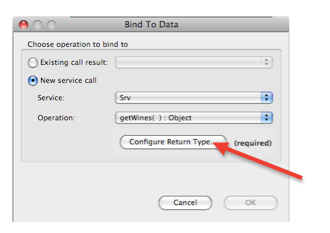
10. This will bring up the “Bind to Data” dialog box. Click on “Configure Return Type” to configure the datatype for the returned object.
11. The next dialog will prompt you for a datatype. NOTE: on other projects, you might wish to use one of the default data types; however on this one, we are going to create our own object type called “WinesArray” as shown below.
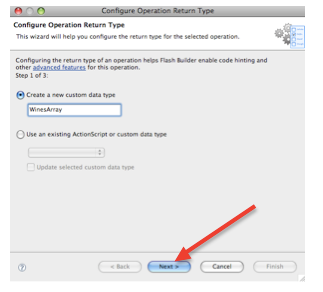
12. Click “Next”
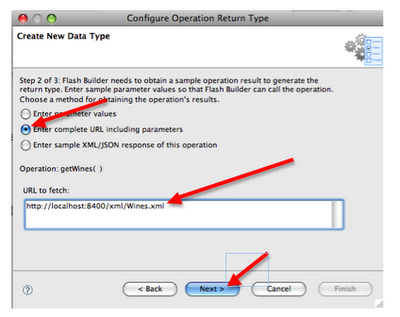
13. The next dialog will invoke the service request to get a sample of the data to inspect. For this lab exercise, select the radio button labeled “Enter complete URL …” and enter the URL of the XML file in the “URL to fetch” box below and click “Next”.
14. Flash Builder will go to the URL, retrieve a sample of data, and break down its structure for you. In this case, it has selected that it may be an array. Rather than accept the first option as is, use the drop down list to select a context root of “Vintage” as shown below.
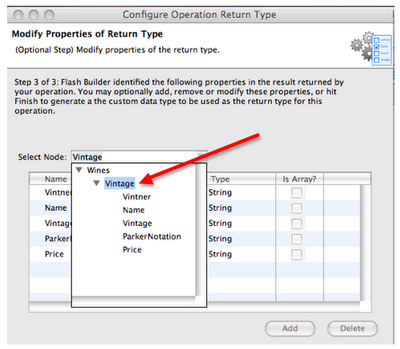
15. Now you will have the following
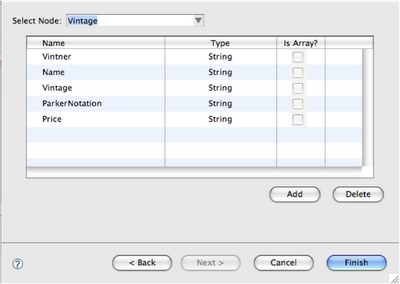
16. Click “Finish”
17. Close the last dialog by clicking “OK”
18. Your project should now reflect the DataGrid being bound to the data as shown below:
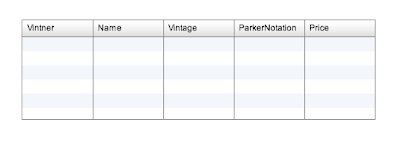
19. Run the project and you Flex 4/AIR application will build and display the XML from the server.
Nice tutorial..helps me alot
ReplyDelete