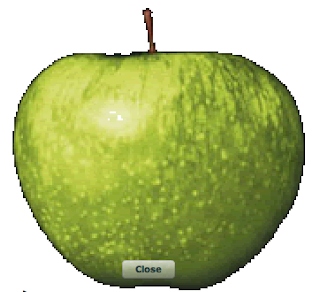
The first thing you need is an image of an apple that has a transparent background. I recommend *.gif format. You can use Adobe Fireworks to set the transparency. After you use the magic wand tool to remove the background, click "Save as" then open up options and you can set the transparent colors. Alternatively, you can just use this image.
We can re-use the code from the Custom Chrome AIR Tutorial, but we will have to change a few lines to get this to work.
1. Set up a new project and give it a name as described in the first steps of the Custom Chrome example. Then, in Flex Builder, right-click (PC) or ctrl-Click (Mac) on the name of the project and select "New -> Folder". Name the folder "images" and copy the transparent apple.gif file (referenced above) to that folder. If you do this outside of Flex Builder, you will have to tell Flex Builder to "refresh" the folders under the project. To do this, right-click (PC) or ctrl-Click (Mac) on the name of the project and go down the list to click "refresh". Flex Builder now sees the file.
2. Since we are making a transparent window the shape of an apple, the root pane must not have any visible rectangular components.
To get rid of the rectangular title window, remove these lines of code (basically everything in between the opening and closing <mx:titlewindow> and </mx:titlewindow> elements):
<mx:TitleWindow  id="mainPanel" backgroundColor="#0326FD" layout="absolute" cornerRadius="15" alpha="1.0"
 color="#FFFEFE" width="465" height="160" backgroundAlpha="0.7" borderColor="#1FBDF7" themeColor="#2FE7FD"
 x="0" showCloseButton="true" close="closeEvent(event)">

 <mx:Label text="Look mom - no chrome!" width="400" textAlign="center" fontFamily="Verdana" fontSize="15" fontWeight="bold" x="22.5" y="10"/>
 <mx:Label x="62.5" y="92" text="(c) Duane Nickull - samples at technoracle.blogspot.com"/>
</mx:TitleWindow>
Replace them with this code for the apple-shaped window (cut-and-paste this if you're lazy like me or simply grab the full code from the end):
<mx:Image id="mainPanel"   x="42" y="10" width="363" height="343"
 source="images/apple.gif" scaleContent="true" autoLoad="true"/>
<mx:Button x="176" click="close()" y="305" label="Close" width="60" height="21"/>
If you named your directory something other than "images" you should change the code above to reflect this.
3. Now we need to add in the function "close()" that is called when the button is clicked. The function is only a few lines of code. Put this inside the existing <mx:script> element:
public function close():void {
   stage.window.close();
}
That’s basically it. The complete code is below. Of course, you could use other methods to close the window. I just put the ugly button in the middle of the apple for convenience since I only had 15 minutes to write this.
Complete code (please feel free to cut-and-paste, use for your own purposes):
<?xml version="1.0" encoding="utf-8"?>
<mx:Application xmlns:mx="http://www.adobe.com/2006/mxml" layout="absolute"
 xmlns:utils="utils.*" creationComplete="init()" height="424" width="465" >

    <mx:Style>
        Application
        {
            /*make app window transparent*/
            background-color:"";
            background-image:"";
            padding: 0px;
            margin-top: 0;
   margin-right: 0;
   margin-bottom: 0;
   margin-left: 0;
        }
    </mx:Style>

  <mx:Script>
   <![CDATA[
            import flash.display.Bitmap;
            import mx.events.CloseEvent;

    public function init():void {

         // Move the app when the panel is dragged
    mainPanel.addEventListener( MouseEvent.MOUSE_DOWN, startMove );

    }
   public function startMove(event:MouseEvent):void {
       stage.window.startMove();
    }

    public function close():void {
       stage.window.close();
    }
   ]]>

  </mx:Script>


  <mx:Image id="mainPanel"   x="42" y="10" width="363" height="343"
   source="images/apple.gif" scaleContent="true" autoLoad="true"/>
  <mx:Button x="176" click="close()" y="305" label="Close" width="60" height="21"/>


</mx:Application>
Hi Folks,
ReplyDeleteyou also can use this solution without setting a "mx:Style" tag with all the background and margin settings.
And you can use the "mx:WindowedApplication" class if you are developing an AIR app.
All what you have to setup is this:
in "rootContent" tag in the Application-app.xml you set systemChrome="none" and transparent="true".
When you start your app then you will see the FlexChrome. To get rid of it, set the style property of your WindowedApplication object to showFlexChrome="false". And now you can customize and code your own chrome style. Have phun. ;)
Sweet!
ReplyDeleteI'd been wondering about that for a long time. Thanks for the tutorial.
I was just wondering, is there any way to allow for resizing with AIR using Javascript? I have yet to find it.
ReplyDeleteAfter copyong the code i'm facing this error :(
ReplyDelete"Access of possibly undefined property window through a reference with static type flash.display:Stage."
Can you please tell me the solution?
In AIR Beta 2 the stage.window.startMove() was changed and needs to be stage.nativeWindow.startMove().
ReplyDeleteThanks!
ReplyDeleteBy your help I finally got rid of the chrome on windows..
Window
{
showFlexChrome:"false"
}
NOTE: Since I originally wrote this, AIR has evolved somewhat. There are better ways to do most of this now and some of the API's have changed. If you want to try this, use this as a guide only and consult the API docs.
ReplyDeleteWhen you start your app then you will see the FlexChrome. To get rid of it, set the style property of your WindowedApplication thanks
ReplyDeleteThanks, for this information and news it was very useful to me
ReplyDeleteCongrulations for this nice web design..Usefull..
ReplyDeleteThe design you have specified is for an application, is there a similar design for a mxml component??
ReplyDeleteYou can use this as a component however as an MXML component for a Flex application, the chromeless nature will not work. As an AIR MXML component, you can use this as is (changing it to a component of course).
ReplyDeletehanks for that nice web site. At that point people are paying and respecting your opinion rather than simply hiring you as a builder.
ReplyDeleteThanks for that nice web site. At that point people are paying and respecting your opinion rather than simply hiring you as a builder.
ReplyDelete